What At-Home Microneedling Actually Does to Your Skin
Today, I want to take an honest, evidence-based look at one of the most popular at-home microneedling systems on social media: the Banish microneedling system.
Banish microneedling system: https://www.banish.com/DRSARAH
This post focuses on first impressions, usability, cost, and what really happens to your skin and the needles themselves when you microneedle at home, including what I saw under high magnification.
About This Project
This is part of a larger project where I examine at-home microneedling systems under the microscope.
Banish was founded by a woman named Daisy, who has publicly shared her struggles with acne and acne scarring. In-office microneedling is expensive, and Banish was created to make microneedling more accessible and affordable at home.
As a dermatologist, I genuinely sympathize with that goal.
Acne is treated as a medical condition, and for people with insurance, acne treatments are often covered. Acne scarring, however, is considered cosmetic. Many patients feel disfigured and helpless because they can’t afford to treat scarring that significantly affects their quality of life.
I previously reviewed the Qure microneedling system and shared my honest thoughts on its pros and cons. I’ve also already explained how home microneedling differs from office microneedling. If you’re interested in that comparison, I recommend starting there.
Today, I’m looking at another popular at-home system: Banish.
First Impressions of the Banish Microneedling System
From a usability standpoint, Banish immediately felt more ergonomic than smaller micro-infusion systems like Qure.
Instead of a short, bulky treatment chamber, Banish uses a long handle, which allows for different grip positions. That alone makes it easier to control and less awkward to use.
The experience also felt less uncomfortable compared to stamping with Qure.
Another major difference is the face plate size.
Banish has a much broader face plate, which means:
Fewer stamps are needed
Coverage is faster
The process feels less tedious overall
In that sense, the experience is closer to using a dermaroller, but with more controlled stamping.
Cost Breakdown
The initial cost of Banish is higher upfront:
$130 for a starter kit
Includes the handle and 2 needle heads
Replacement heads:
~$20 per head
~$18.75 per head if you buy 8 at once
According to the company:
One head can be used:
1 time on the scalp
8 times on half the face
3–4 times on a full face
That works out to roughly $75 per full-face treatment, which is not cheap, especially initially.
The needles are gold-plated titanium, which I appreciate. Gold is much less likely to trigger metal allergies compared to other metals, especially nickel and nickel-containing metals. This includes stainless steel, even when it’s called “surgical grade” stainless steel.
Caption: Image showing allergic contact dermatitis that developed after using titanium-coated stainless steel microneedles.
Image source: https://academic.oup.com/asj/article-abstract/36/4/NP168/2613925
What I Did Under the Microscope
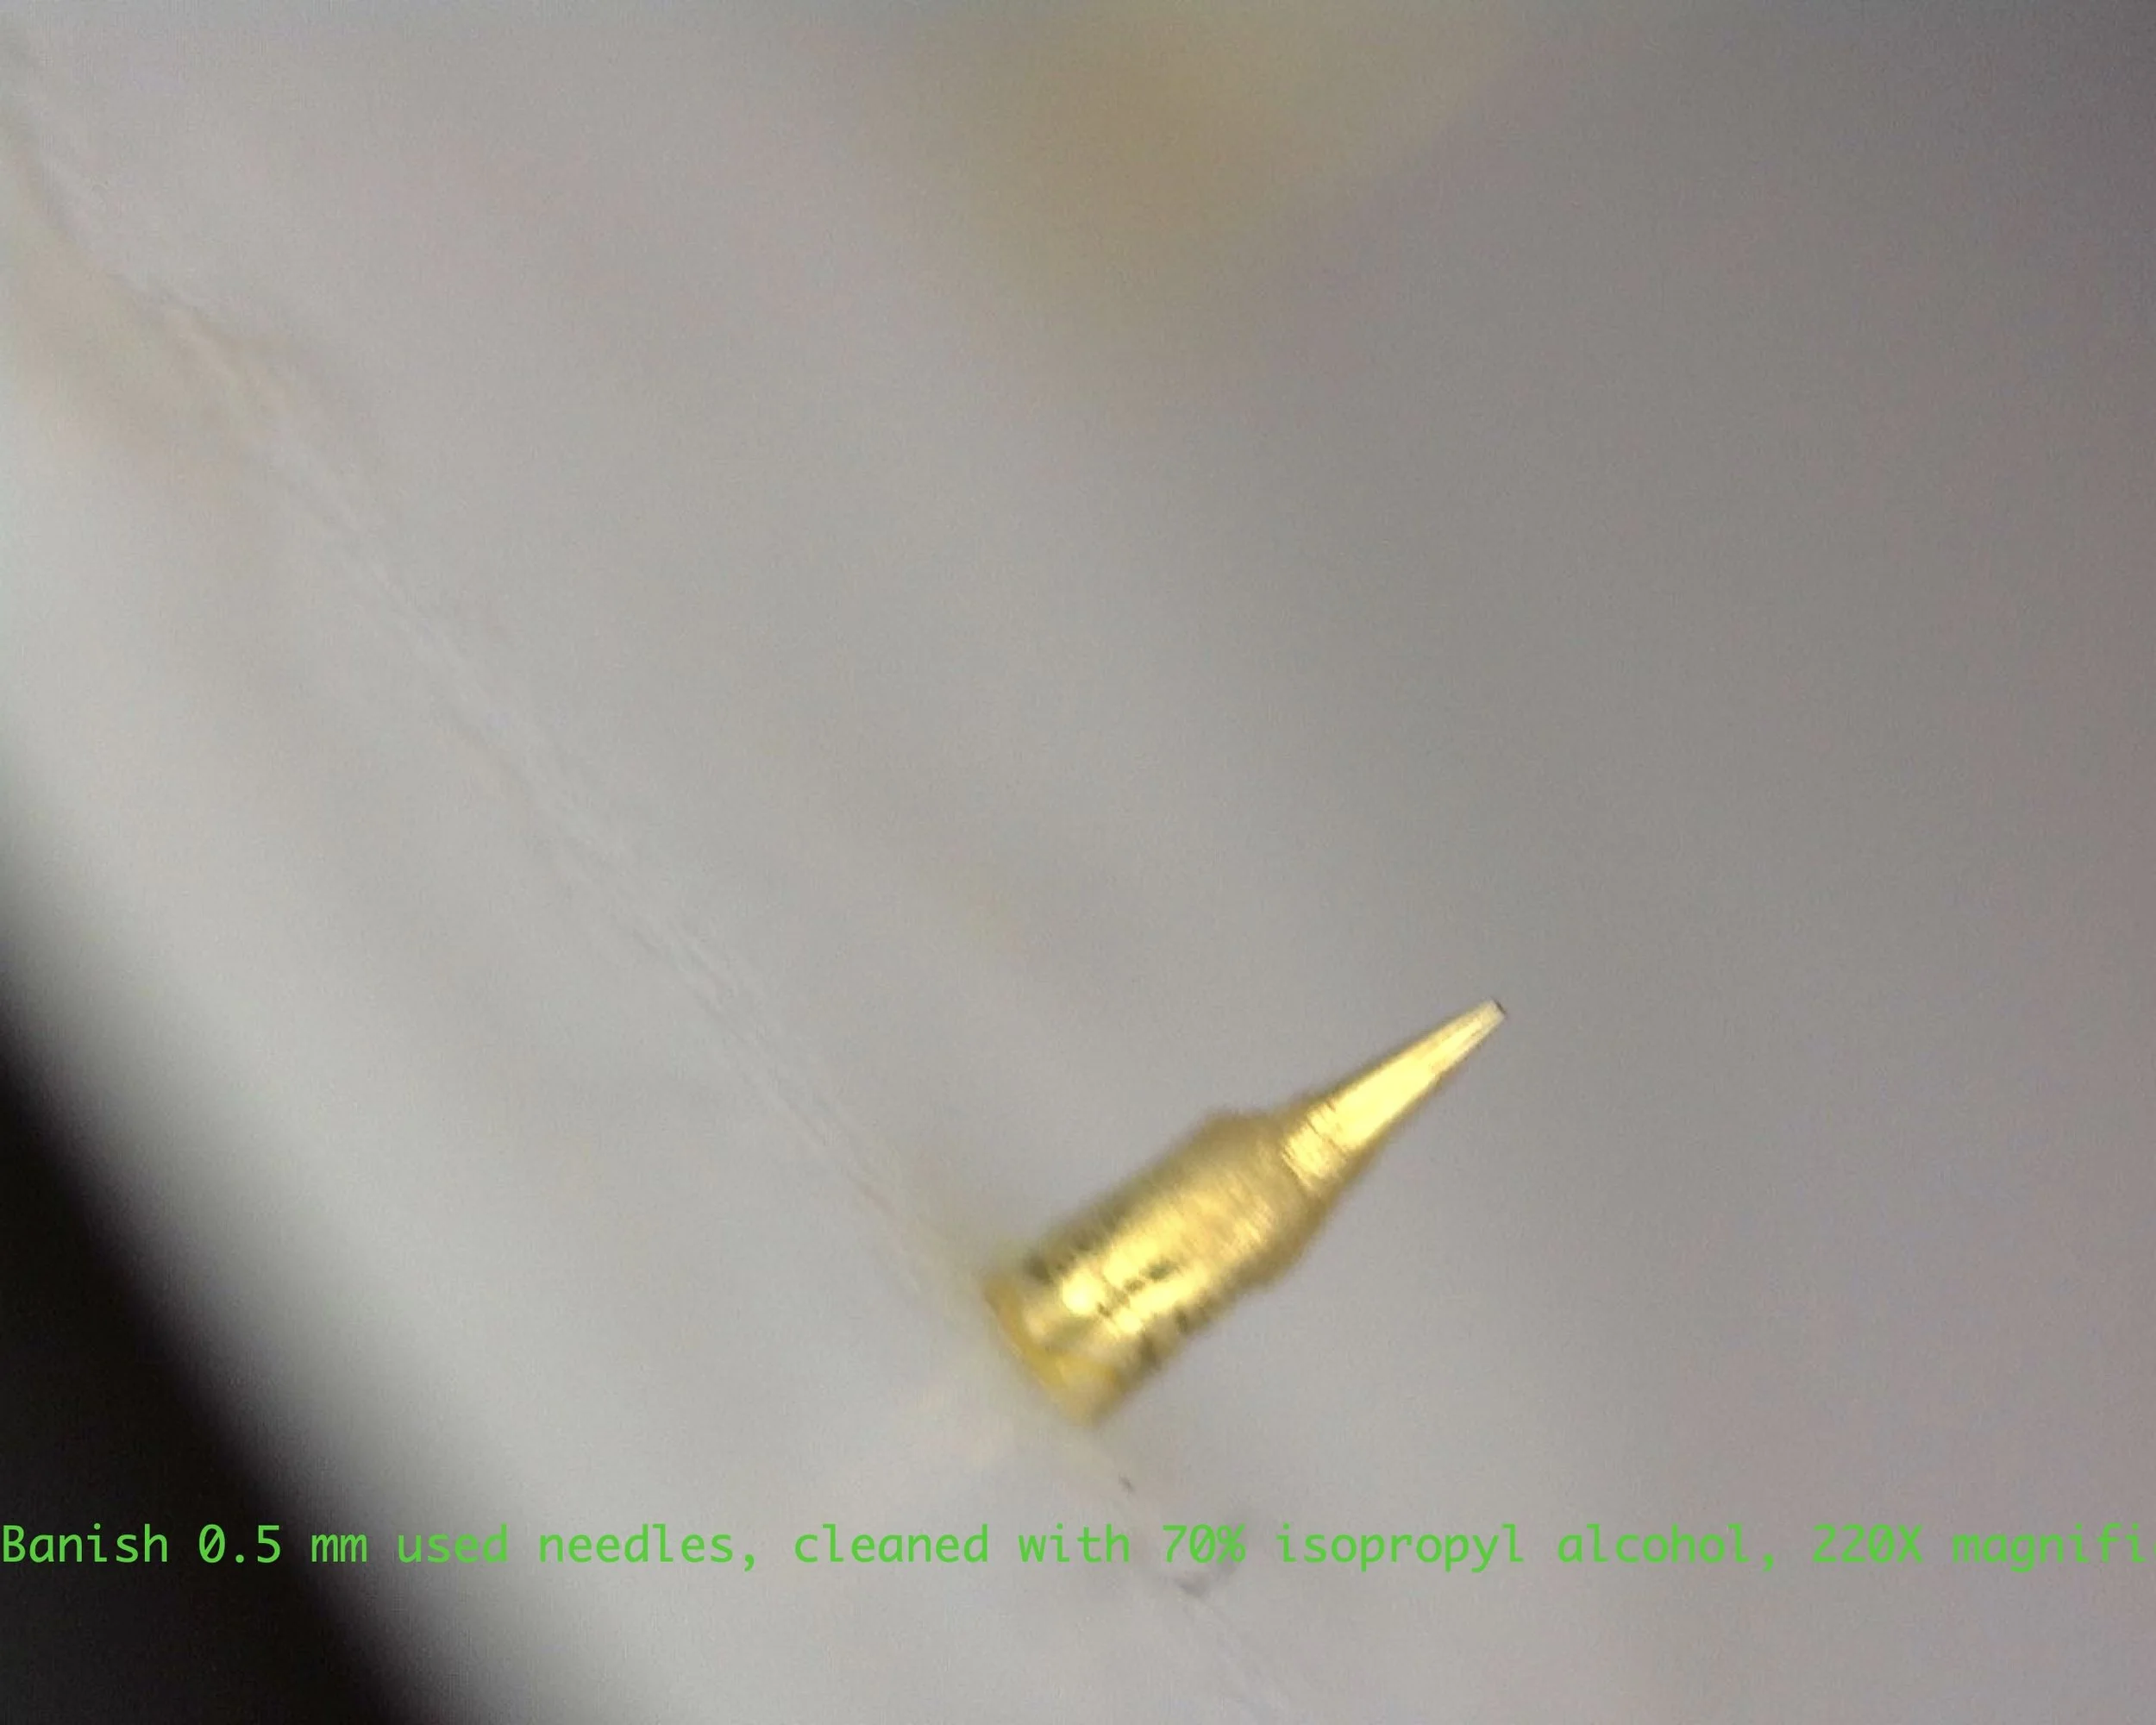
To understand what was really happening, I examined both the needles and my skin before and after microneedling using a video dermatoscope capable of up to 220× magnification.
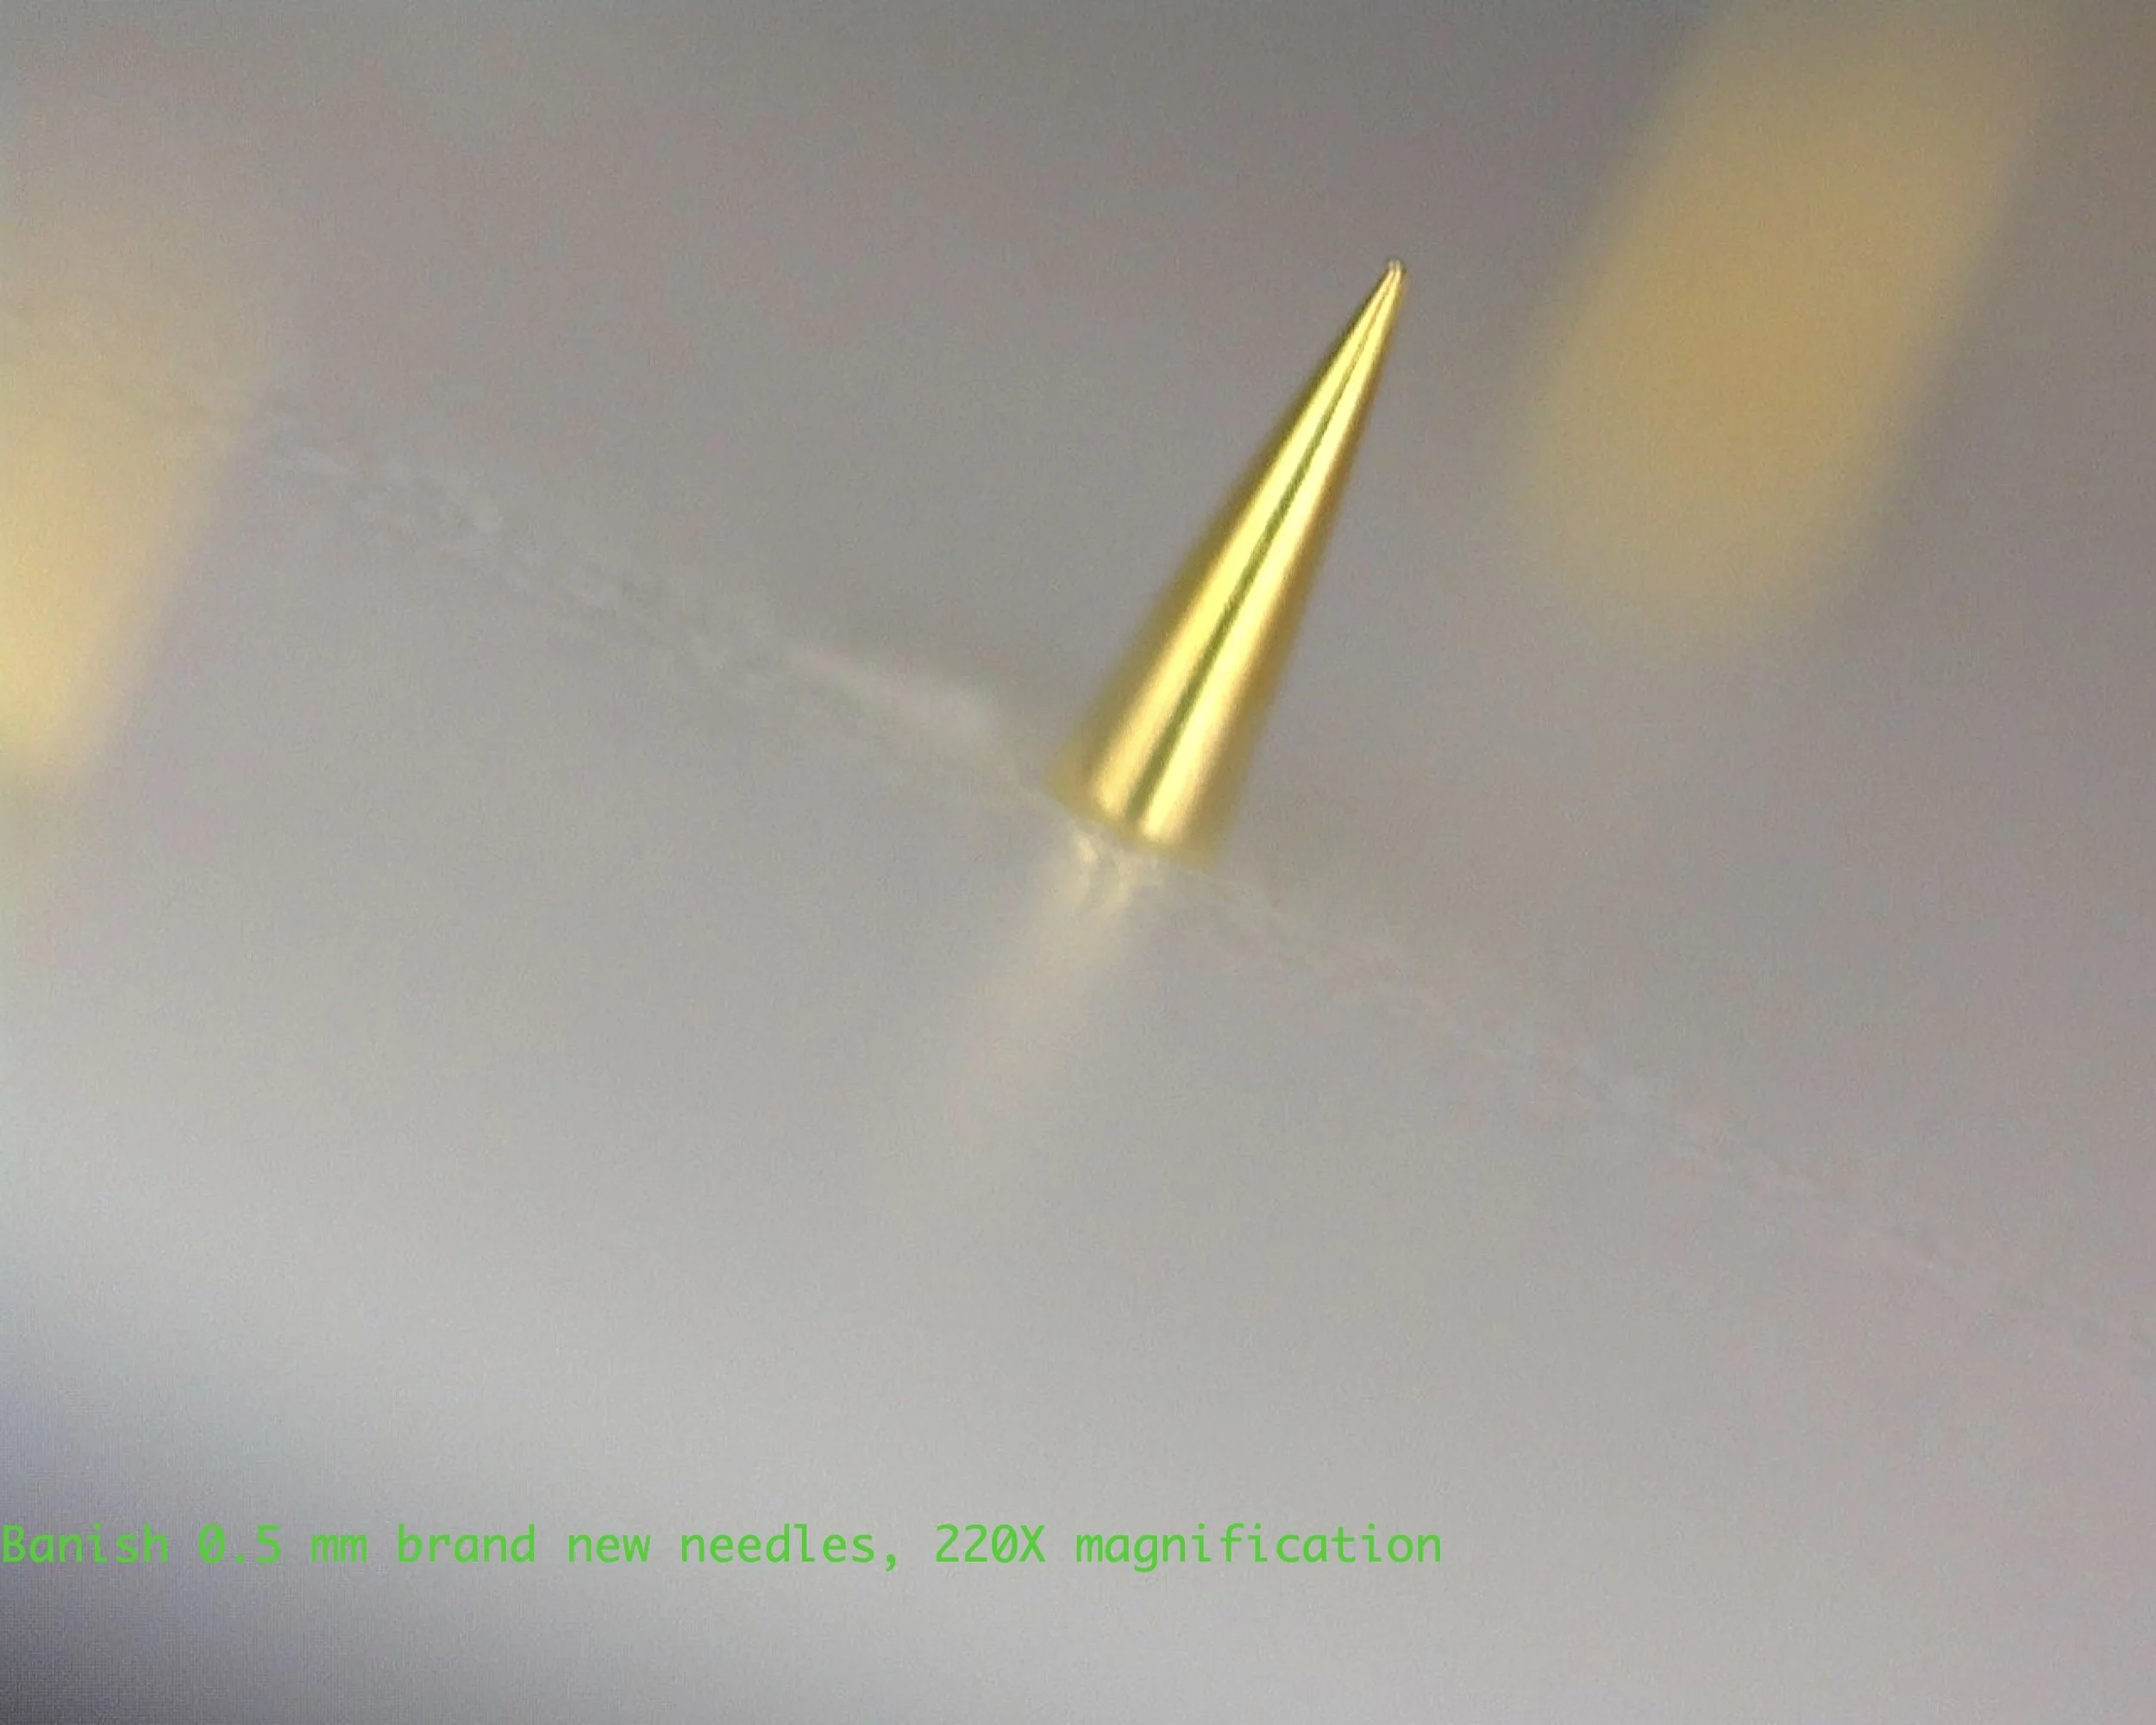
Caption: This is what a brand new 0.5 mm needle from the Banisher looks like at 220X magnification
The tool I used to capture these images is similar to what I use in clinic for skin cancer exams.
I tested:
0.5 mm needles
1.0 mm needles
What the Skin Looked Like After Microneedling
After 0.5 mm needles:
To the naked eye, the skin looked mildly irritated
Under magnification, you could see small tears in the skin barrier
After 1.0 mm needles:
To the naked eye, there was visible redness
Under magnification:
Clear bleeding
Much more significant barrier disruption
This difference matters.
What the Needles Looked Like
Brand-new needles
Fresh out of the box, the needles looked sharp and intact.
However, on one of the 1.0 mm heads, I noticed visible debris straight out of the packaging. I unsealed it myself. I haven’t seen this on other needles, and I suspect it may have been a manufacturing defect.
After use
After just 10 stamps on one hand, skin residue was already visible on the needle tips.
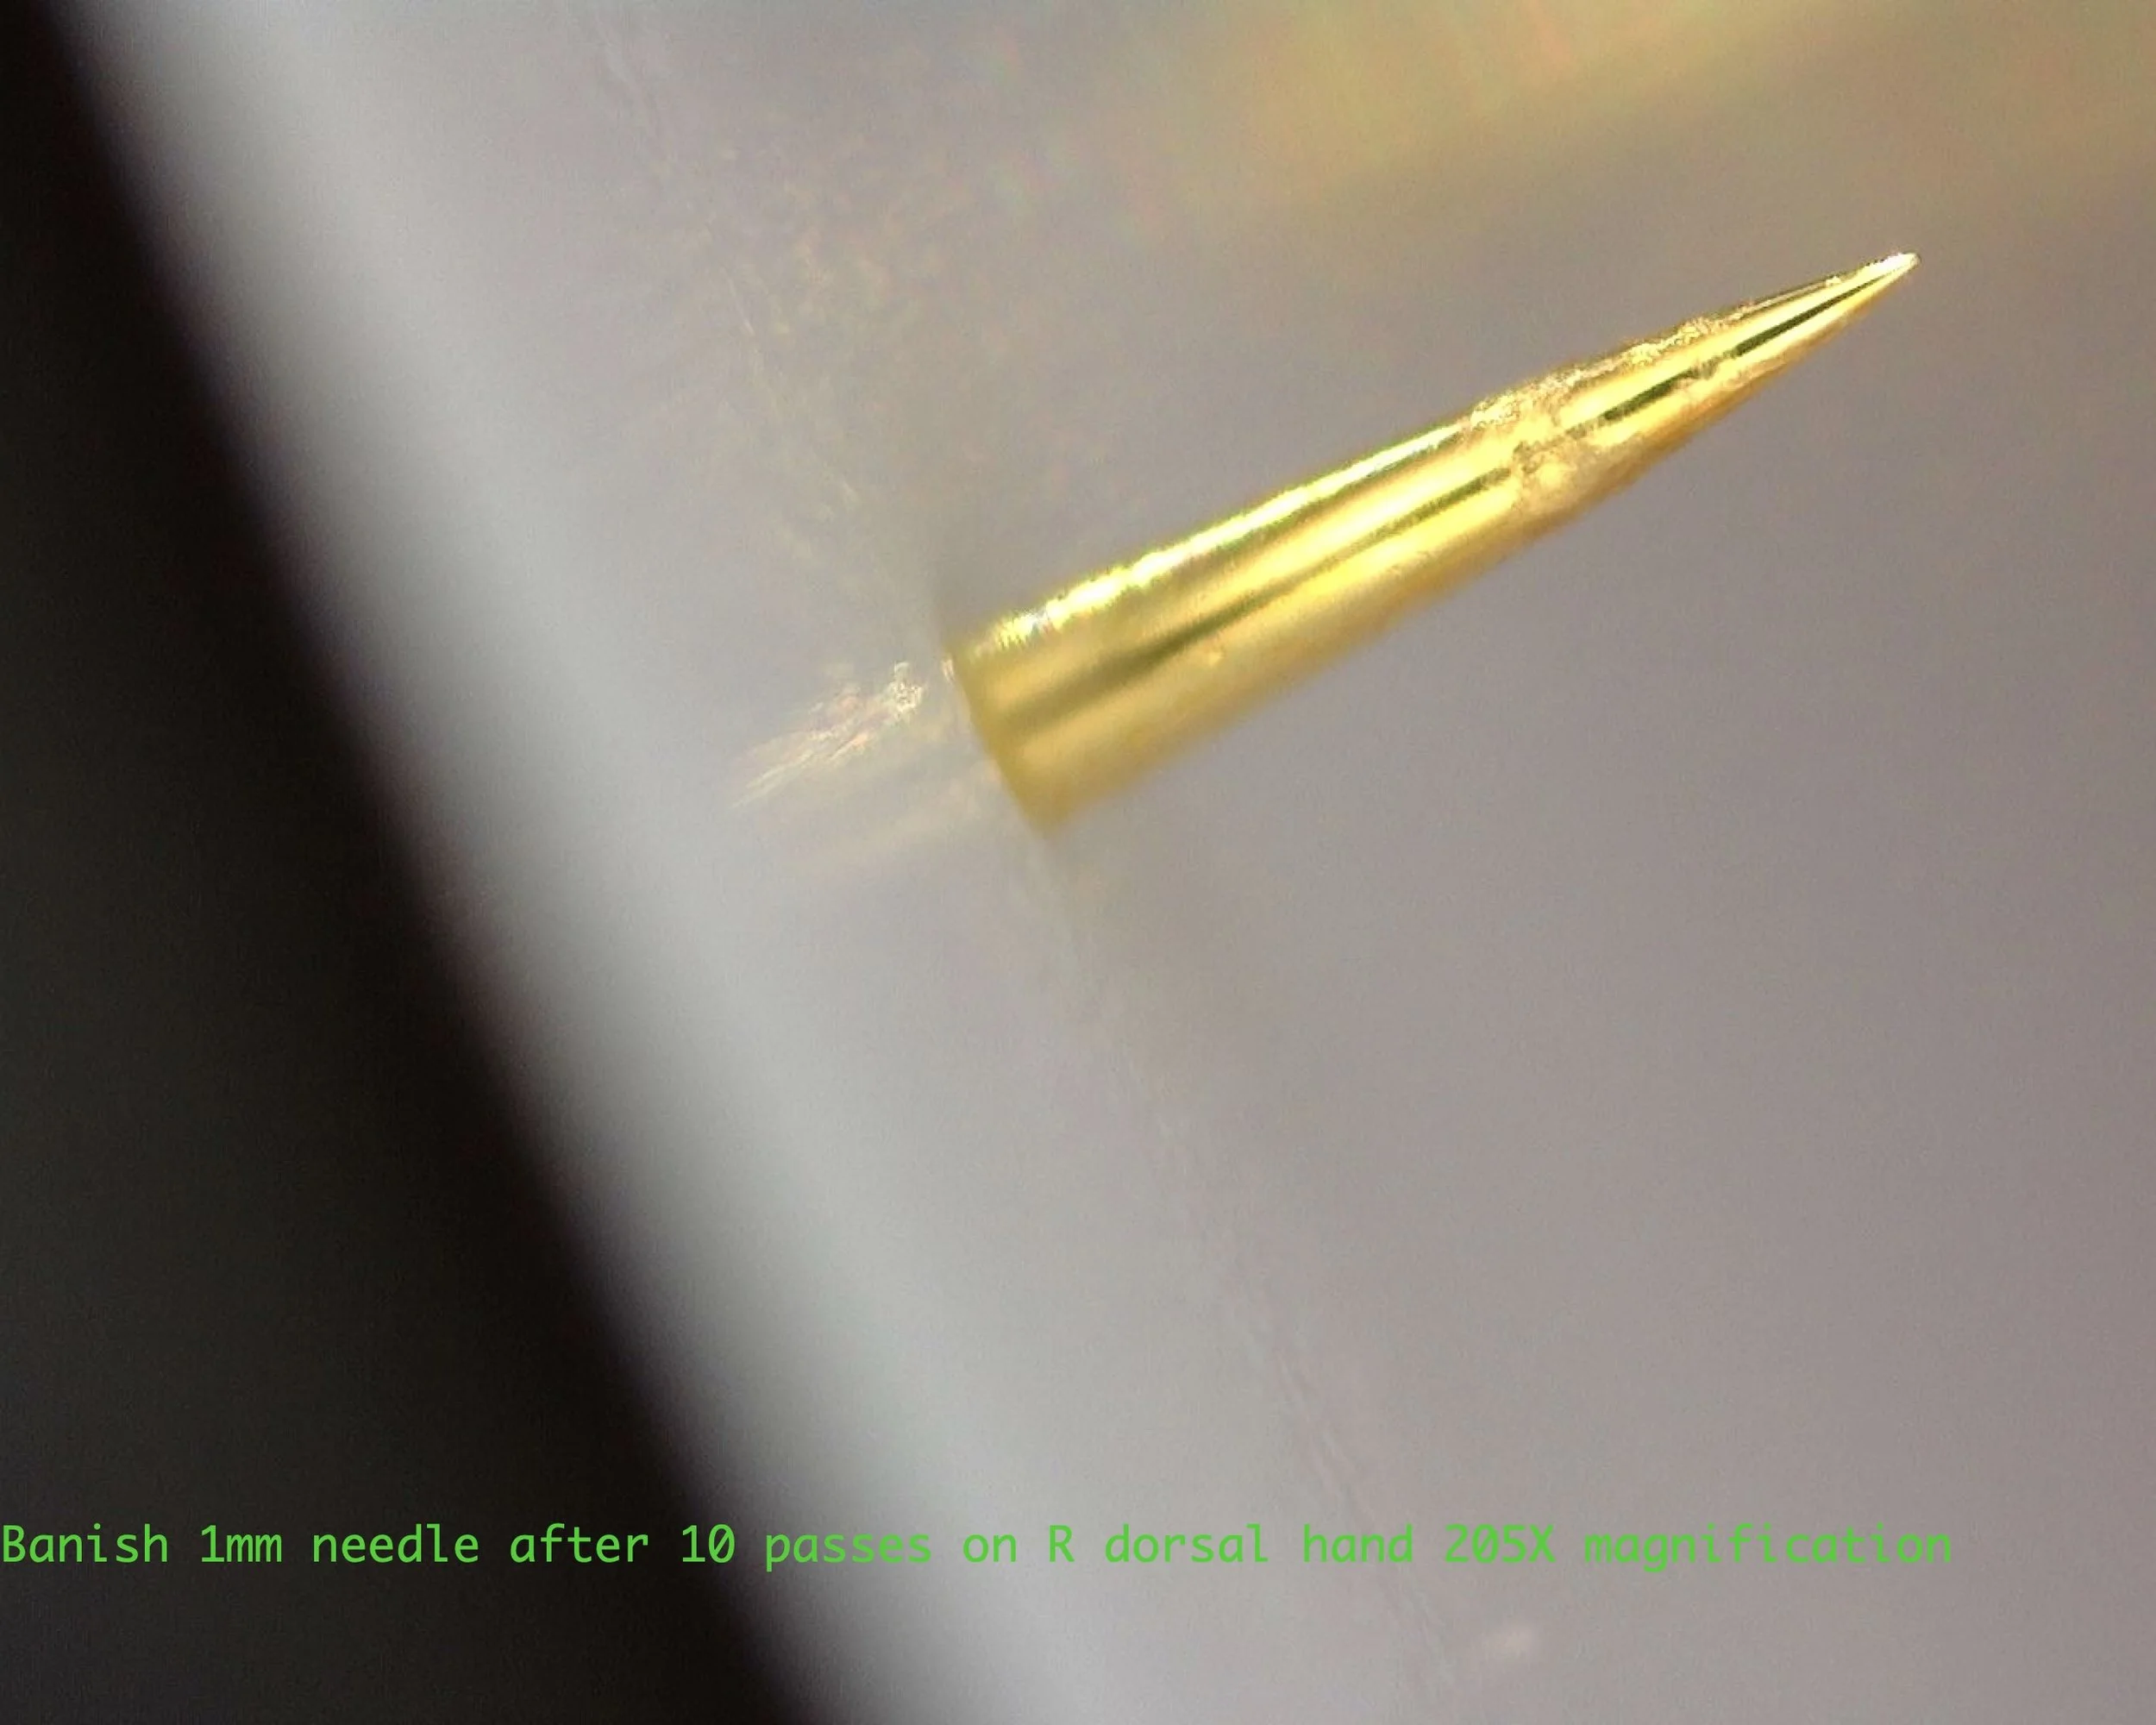
Caption: Image showing 1 mm microneedle after 10 stamps, shown at 205X magnification
After 3 full-face uses, there was a clear film of skin debris coating the needles, even though this is within the manufacturer’s recommended replacement window.
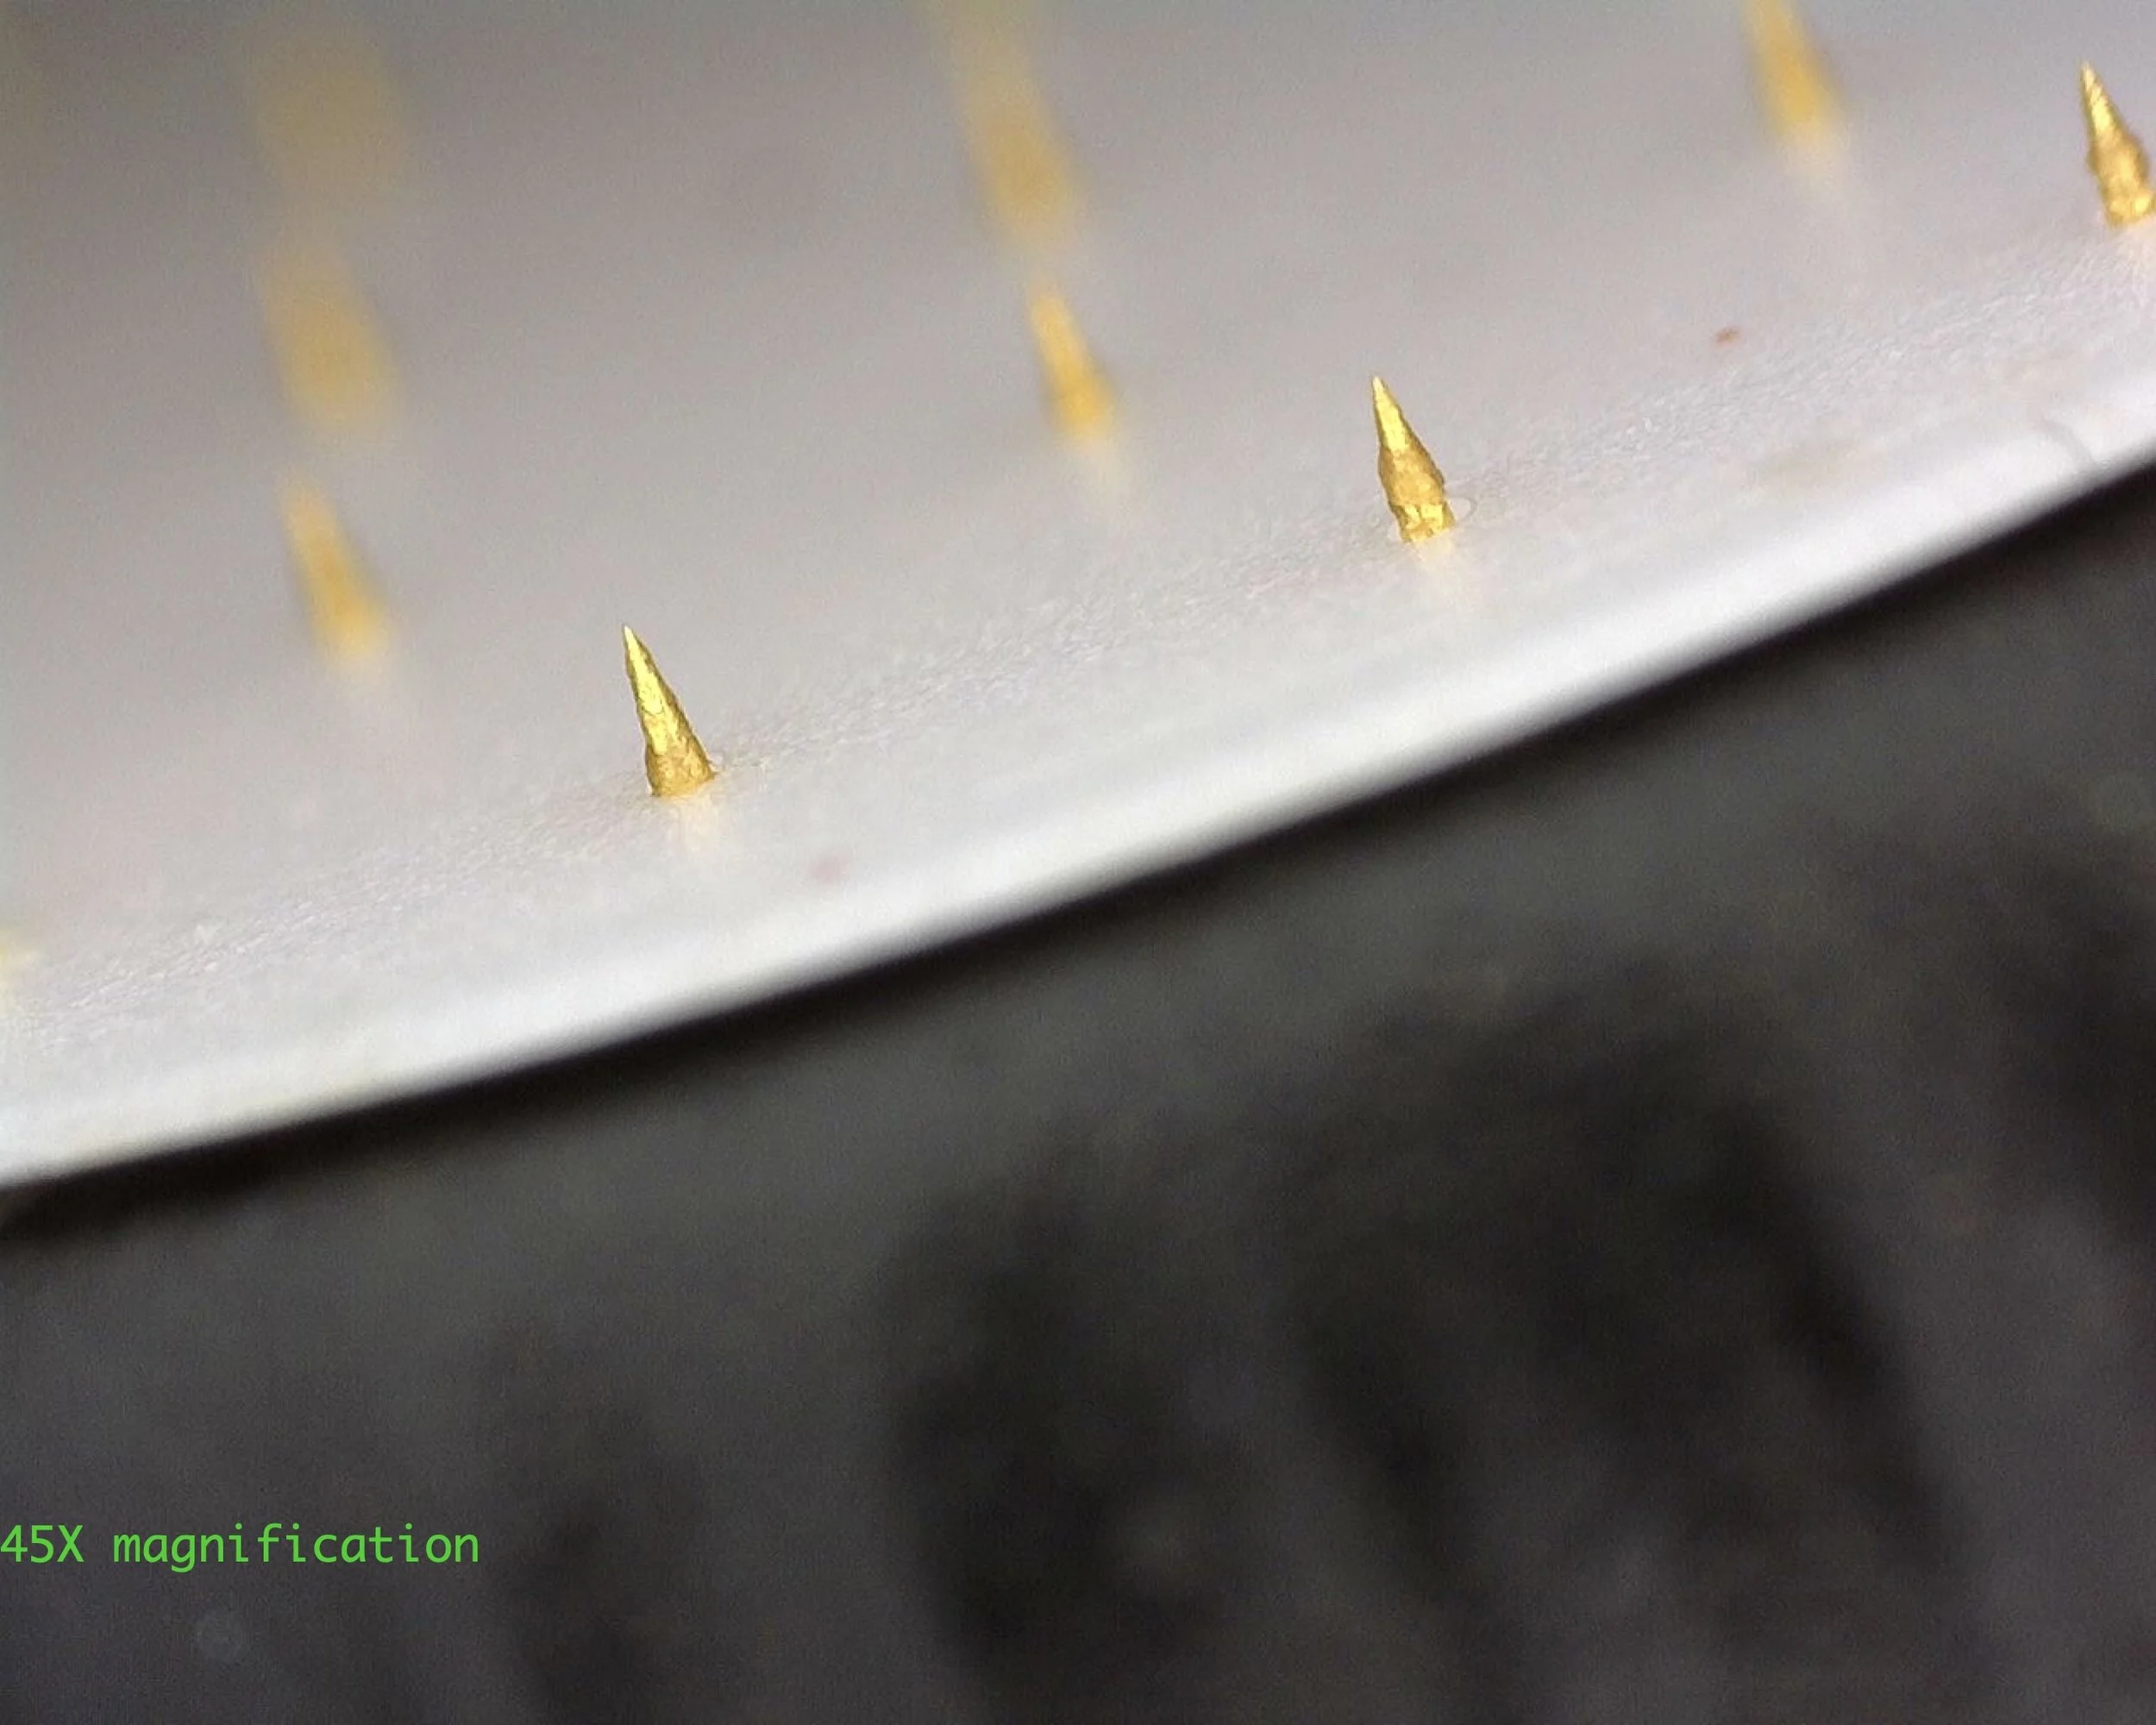
Caption: Image showing skin debris on 0.5 mm needles after 3 full face passes, 45X magnification
Caption: Image showing skin debris on 0.5 mm needles after 3 full face passes, 220X magnification. This is after manually agitating the needles in 70% isopropyl alcohol.
The Surprising Findings
The good
The needles were far more resilient than I expected.
I anticipated blunting or bending, but the tips stayed sharp even after multiple uses.
The concerning
Skin debris accumulates very quickly.
A microscopic film of skin oils and dead skin cells builds up on the needles. It’s like a snowball. Small at first, then it layers on itself.
Even soaking or shaking the needles in isopropyl alcohol does not fully remove this debris. Alcohol cannot penetrate or mechanically disrupt that film.
It’s the same reason you can’t clean greasy hands by just rinsing them. You need friction. Dunking dishes in soapy water without scrubbing leaves grease behind.
Similarly, soaking microneedling needles in alcohol leaves behind microscopic debris that can shelter bacteria and viruses.
A Future Experiment I Want to Try
Because I’m curious and because I want to see if there’s a safer way for people to reuse very shallow needles at home, I’d like to test whether a vortex mixer could help alcohol more effectively break up skin debris. Some commenters also suggested using an ultrasonic cleaner, which I thought was an interesting idea, as well.
I have no conflict of interest here.
I’m not paid by office microneedling companies. My practice focuses on medical dermatology, not cosmetic procedures, and I make zero dollars from office microneedling.
I would actually make more money hyping at-home microneedling and ignoring these flaws, because most companies offer affiliate commissions. But that’s not the point of this channel or this blog.
Why I Don’t Recommend Needles Longer Than 0.5 mm at Home
You can easily buy 1 mm, 2 mm, or even longer needles online. Banish states their manufacturer is FDA-approved and produces devices for professional offices.
Even if that’s true, training matters.
Needles longer than 0.5 mm increase the risk of:
Infection
Granulomas from using products not approved for mesotherapy
Allergic sensitization
Bloodborne pathogen transmission
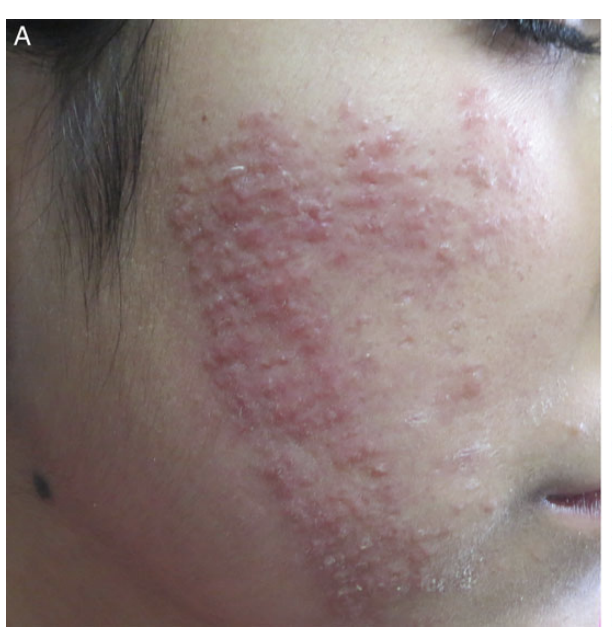
This is an interesting case series of several women who developed granulomas, fever, and joint pain, after a vitamin C serum was applied after microneedling treatments at a medi-spa.
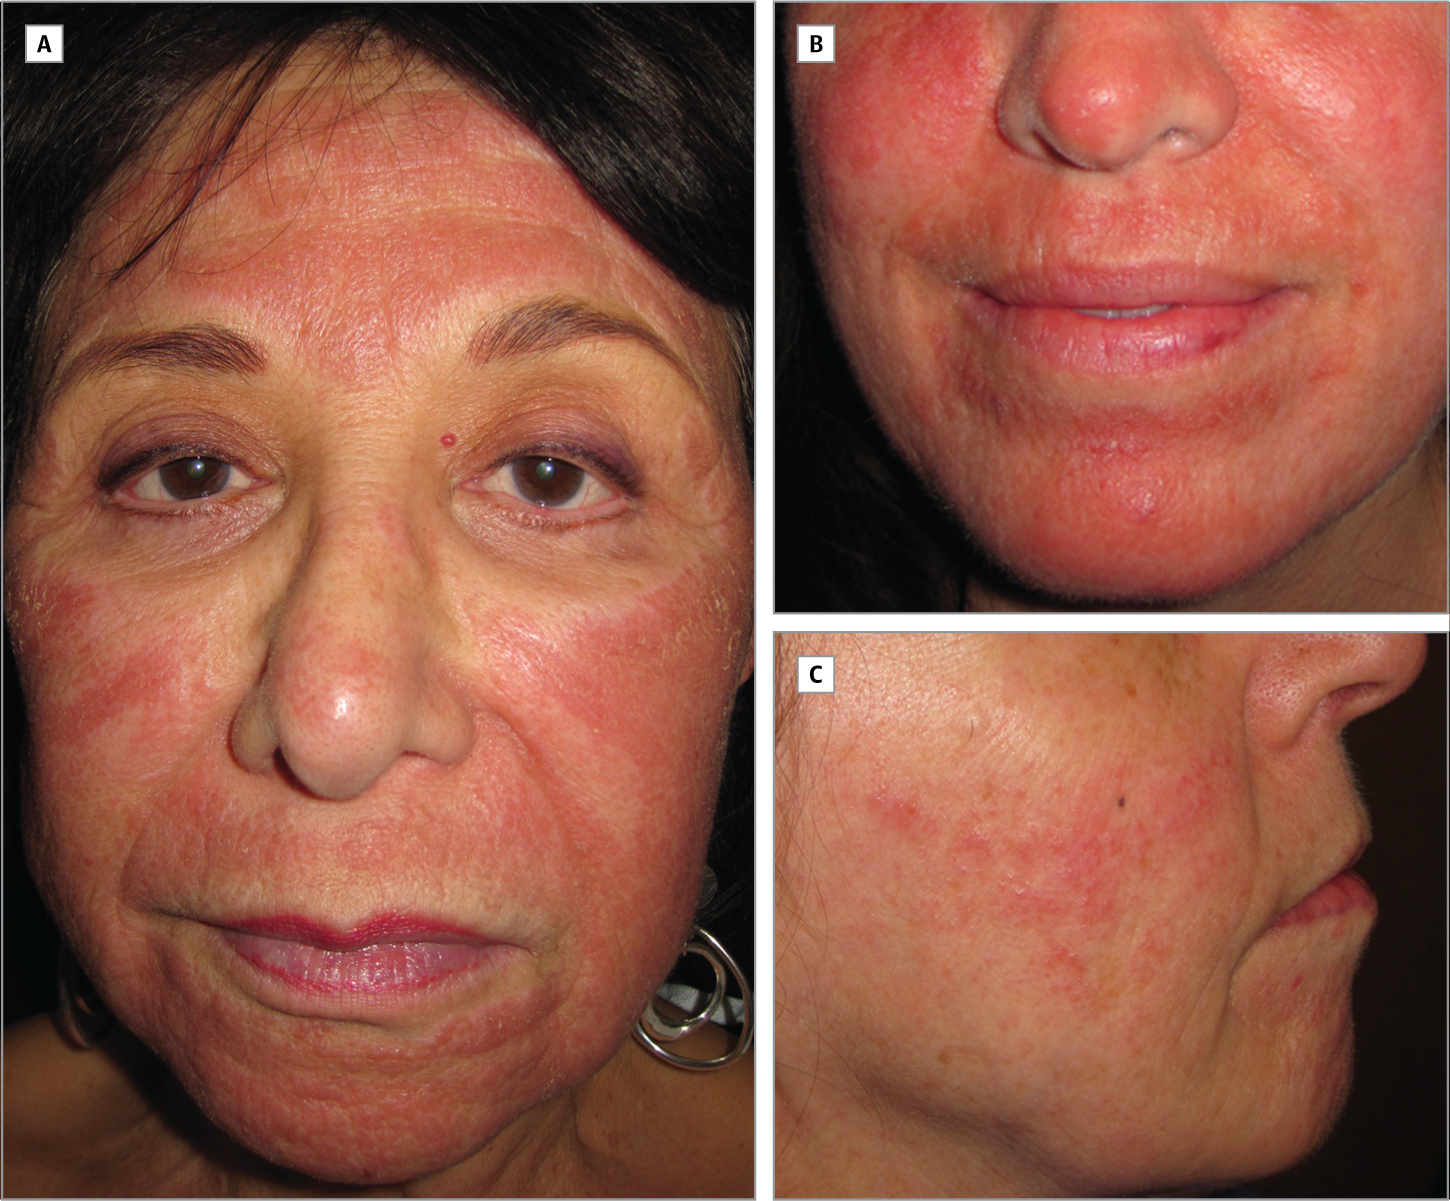
Caption: Image showing a facial rash that developed after applying a medi-spa applied vitamin C serum after microneedling a client’s face.
Image source: https://jamanetwork.com/journals/jamadermatology/fullarticle/1783057
Even shallow needles can spread bacterial or viral infections. Never microneedle over unknown rashes or lesions. I have seen patients spread bacterial and viral infections from microneedling themselves.
The FDA also lists specific populations at higher risk for microneedling complications, and that’s worth reviewing before attempting this at home. Please take a look here, scroll down to the section called “Information for Patients About Microneedling Devices.“
Banish vs. Qure: A Quick Comparison
Pros for Qure
New needle heads for each treatment
Comes with a serum
Pros for Banish
More comfortable to hold
Less tedious due to larger face plate
Cost
Qure: ~$120 for a month supply
Banish: ~$130 starter kit
Overall, costs are similar.
Final Thoughts
For me, skincare is a form of self-care.
At-home microneedling is not my favorite at-home treatment, mostly because I don’t enjoy the sensation. Most people don’t find it very uncomfortable, but I’m also not the target market.
My skin has plenty of issues, including sensitivity, rosacea, and hyperpigmentation. Acne is not one of them. And because I don’t have significant acne scarring, I don’t have the same incentive to push through discomfort.
For people who do suffer from acne scarring, I think at-home microneedling can be a reasonable option if safety is taken seriously.
It will never be as effective as in-office microneedling due to differences in needle length, technique, and training. But for some people, it may be better than doing nothing.
Disclaimers: This post is not intended to be a substitute for medical advice, diagnosis or treatment with your healthcare professional. This is for medical educational and entertainment purposes only. I am not sponsored by any of the companies mentioned in this blog post. I may earn commission from purchases made through my referral links.